Monday, 29 July 2013

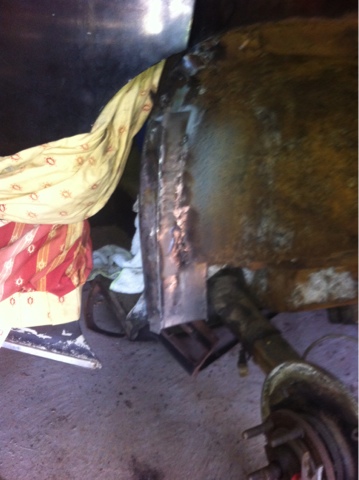
Left rear quarter

My carpenter came over last weekend - either I didn't give him enough or too much beer...
Anyway, these pieces hold the spare wheel lid and are thoroughly rotten. 


While waiting for the carpenter to sleep off his hangover, I've replaced loads of rust with new sheet metal and a first bit of paint.  Almost all sheet metal in the rear quarter, i.e. boot floor (three layers), inner wheel well, and the outside panel have been replaced.


Without wooden supports:

And with the wooden supports back in place:

Inside the trunk, showing the tools storage bay with new floor.  While grinding off excess welds, this caused a bit of a fire - a spark must have somehow gotten to the inside of the rear seat upholstery and started causing a bit of smoke there.  It took 10 liters of water to kill it....

The wing is progressing slowly, lots of fittings and adjustments but starting to look good!

Friday, 12 July 2013

New supplies and toys

Work's still ong, but in the mean time I've picked up a few pieces of ash.  Hope my faithful sidekick with much more feeling for woodworking than I have is back soon!
 
And some new toys (uhhh tools).  The lowest plyers are specially designed for (un)folding the doorskin around the frame and work like magic!  Shame I only bought them after already having done two doors.  Guess I need more cars ;-)
 

Monday, 3 June 2013

Left rear fender Mk3

The inner fender now mostly done, it's time to tackle the fender/wing itself.  Most people would consider this a lost cause, and rightly so...  It's pretty horrific:


Plan of attack: first make a new mounting plate.  Now that the inner fender is repaired, this can be bolted onto the car and in that way, provide the exact shape the fender should follow.  After that, I'll repair the fender bit by bit.  The toughest bit seems to me to be the curved edge at the bottom of the wing. 
The front wings have a wire edge, the rear wings both have a more simple curved edge.  I wonder which is authentic...


I can't help doing several things at the same time.  I've already been working on removing the *bleep* window winder...
to be able to remove the door card to get at this:
The rod connecting the door to the pillar has been bent out of the way for ages, and the spring loaded mechanism behind it apparently jammed.  I'll get to it, just give me time!

Tuesday, 30 April 2013

Register status

For some specific Marks I've been trying to keep a detailed record of the extant cars.  Current number of cars that I know or believe to still be around:

Humber Pullman Mark II: 8
Humber Pullman Mark III: 16
Humber Pullman Mark IV: 5

Humber Super Snipe Mark II: 21
Humber Super Snipe Mark III: 28

If you have a Humber I'd like to hear about it! 

Humber Pullman Mk III

I've been demotivated slightly by the state of the trunk section of the Super Snipe.  After several days of hammering away, the fit of the two boot lids is relatively ok, but now I need to start fabricating new pieces for which I have no pattern.

Consequence: time to think things over a bit (I need quite a bit of that :-)) and to tackle a job I've been postponing for two years now: the left inner fender of my Mk III Pullman. 
The Mark III Pullman is the first Humber I purchased, three or four years ago.  The front 50% of this car has had the vast majority of work done.  The engine runs smoothly with new piston rings, the body work has been almost completely done, chassis painted, brake parts replaced, etc.  By far the biggest job was the left front wing, which I sent out for repairs.  Considering that single wing alone cost me as much to have repaired as the whole car, and considering even more so that I'm so stubborn that I want to do everything myself, I did the other wing myself.  Now the rear 50%.  The two wings are clearly the largest job, for the rest it's only replacing the wooden frame around the boot lid.  All in all, I estimate that within 9 months I can have the car back on the road - if only I didn't also spend time on the other cars.


Why did I postpone this job so long?  Basically because I did not have access to the inside of this section.  I don't want to remove all the upholstery if I can avoid it.  Turns out that I can avoid it quite easily, no major problems in the end:


Now to continue along the wheel well with the smaller repair pieces.

The fender itself is in quite poor shape.  I need to replace most of the foldover, then place a new attachment strip on the inside of that, and also repair the filler well - that's the easy part.
On the right the Pullman fender, on the left the Super Snipe fender.  These have all really suffered over the years...
 

Monday, 8 April 2013

Trunk area - stripping

Spent two or three days stripping the rear section.  Turns out there really is nothing either original or properly aligned.  The lower horizontal cross section is banged up and missing large sections.  I guess the good news is that I can work from scratch, the bad news is I haven't got a clue how to start...  It'll have to start with the outside of the cross section so that the spare wheel cover will fit properly again, then the inside box section.  Then work from there - sounds simple, ehh?


 Came across something nice on EBay as well: