I've been demotivated slightly by the state of the trunk section of the Super Snipe. After several days of hammering away, the fit of the two boot lids is relatively ok, but now I need to start fabricating new pieces for which I have no pattern.
Consequence: time to think things over a bit (I need quite a bit of that :-)) and to tackle a job I've been postponing for two years now: the left inner fender of my Mk III Pullman.
The Mark III Pullman is the first Humber I purchased, three or four years ago. The front 50% of this car has had the vast majority of work done. The engine runs smoothly with new piston rings, the body work has been almost completely done, chassis painted, brake parts replaced, etc. By far the biggest job was the left front wing, which I sent out for repairs. Considering that single wing alone cost me as much to have repaired as the whole car, and considering even more so that I'm so stubborn that I want to do everything myself, I did the other wing myself. Now the rear 50%. The two wings are clearly the largest job, for the rest it's only replacing the wooden frame around the boot lid. All in all, I estimate that within 9 months I can have the car back on the road - if only I didn't also spend time on the other cars.


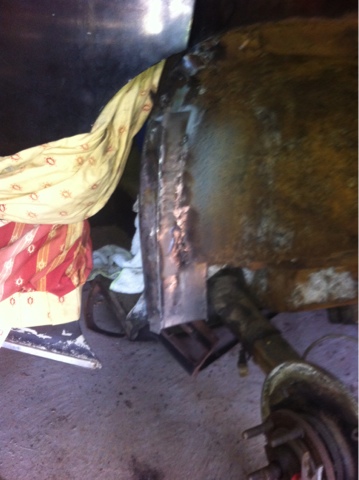
Why did I postpone this job so long? Basically because I did not have access to the inside of this section. I don't want to remove all the upholstery if I can avoid it. Turns out that I can avoid it quite easily, no major problems in the end:
Now to continue along the wheel well with the smaller repair pieces.
The fender itself is in quite poor shape. I need to replace most of the foldover, then place a new attachment strip on the inside of that, and also repair the filler well - that's the easy part.
On the right the Pullman fender, on the left the Super Snipe fender. These have all really suffered over the years...


